Wednesday, March 08, 2023
|
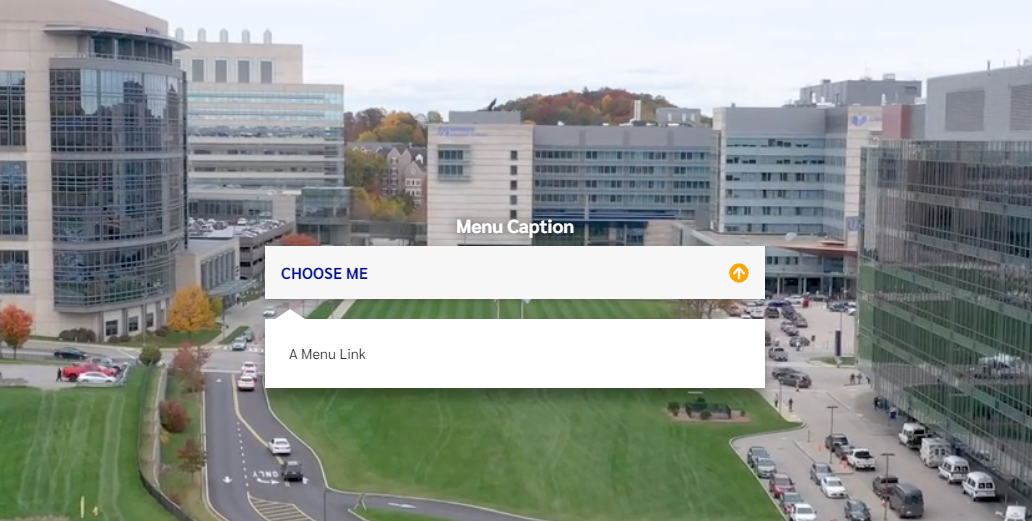
The Hero video block allows a video to be used as a hero on the web page. This block also allows for a dropdown list of links to be centered over the video.
This block ensures that list if formatted properly and that it is ADA compliant.
Examples > Video Tutorial
Create a new block
In a dropblock area on your page, or under your folder in the block pane, create a new block
[user guide: create a new block]
- Add a "Name" and click the create button
- If you created the block directly on the page, you are brought back to you page, click the "..." on your new block to edit it

Properties on the page
[user guide: properties view]
- Choose Video with text overlay Block
Editing the Block
There are 4 configuration tabs available in the block editor:
- Video Settings
- Content
- Settings
- Header Image
Most of the configuration will occur in the Video Settings and Content tabs. The other two tabs are general to all EPiServer blocks so we won’t talk about those here.
Video Settings Tab
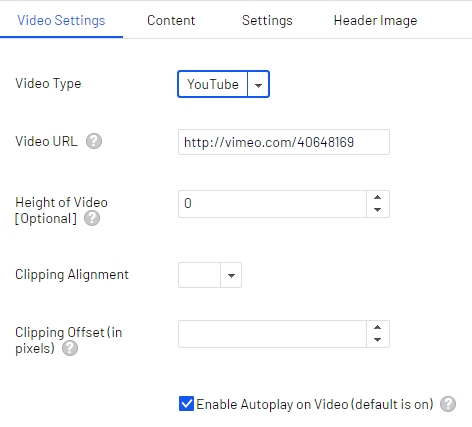
There are a few things you can configure on this block in the Video Settings:
- The type of video you’d like to use
- Wistia
- YouTube
- Vimeo
- Other (WEBM or MP4, CMS media assets)
- Depending on which Video type you choose, there will be a source property for the Video
- Wistia - requires the video ID
- the thumbnail image will be dynamically generated
- To host your videos on Wistia, you will need to create an account https://wistia.com/ to upload your videos
- YouTube - requires the video url
- Vimeo - requires the video url
- To host your videos on Vimeo, you will need to create an account https://vimeo.com/ to upload your videos
- Instructions for obtaining the video URL will be listed in the Vimeo web site
- the thumbnail will be automatically generated by Vimeo
- Other (WEBM or MP4) - you can upload your compressed video to Episerver media assets and drag and drop the video container into the Video Location property
- note - this option requires the creation of a thumbnail image which needs to be uploaded to the Media assets in the CMS
- The Height of the Video Container [optional]
- Used to arbitrarily constraint the height of the container so the video doesn’t get too high.
- Video Clipping behavior
- Used to control the actual video placement in the container when clipping occurs. This only applies if you constrain the height of the container using the property above.
- Video Shift
- Allows you to further refine position of the Video when clipping occurs by arbitrarily moving the video up or down by some number of pixels.
- Enable Auto Play
- Allows you to indicate whether the video should auto play on page load.
Setting the Video
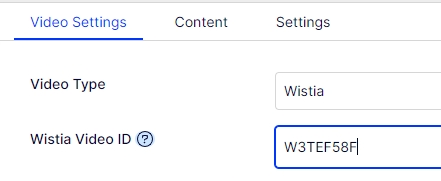
- Wistia
- You will need to create an account https://wistia.com/ to upload your videos
- Wistia provides instructions on how to copy the ID of your video
- In the block properties, choose Wistia and paste in the Wistia ID
- YouTube
- Navigate to the YouTube video you wish to display
- copy the URL in the browser, or click SHARE beneath the video and copy that URL
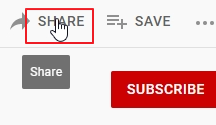
- In the block properties, choose YouTube and paste in the YouTube URL

- Vimeo
- You will need an account on Vimeo https://vimeo.com/ to upload your videos
- Navigate to the Vimeo video you wish to use
- Click the SAHRE icon (paper airplane)
- Copy the URL for sharing
- In the block properties, choose Vimeo and paste the Vimeo URL

- Other (media assets)
- For Other, you will need to create a folder in the media assets of the CMS
- upload your WebM and MP4 video files (MP4 is a fallback if WebM cannot be used on older browsers)
- In the block properties, choose Other and select the media folder that contains your WebM and MP4 video files

Constraining Height and Video Clipping
Videos have a natural aspect ratio that must be maintained to prevent the video content from being distorted. When you place a video in a content area that extends the full width of the browser window, the video will get quite tall on certain displays. A Video that is that tall will push content well below the fold.
In some cases, that is not desirable, and you may want to set the height of the video to a fixed height which will constrain the height of the video container, but that will cause some of the video to be clipped.
You can set the clipping behavior that best suites the video you are using. You do that with the Video Clipping property:
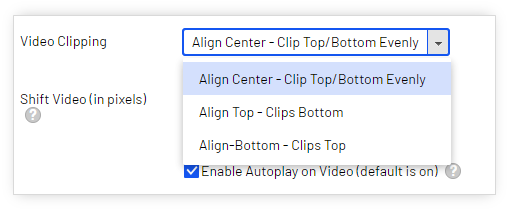
Here’s what happens when you select each of those:
- Align Center – Clip Top/Bottom Evenly. This will place the actual video in the center of the video container and clip the top and bottom equally. Generally, this is a good choice.
- Align-Top - Clips Bottom. This will align the video to the top of the video container and clip off any video that is larger than the video container. This is a good choice if you have people’s heads and such at the top of the source video.
- Align Bottom - Clips Top. This will align the video to the bottom of the video container and clip off the top of video that extends above the video container. This is a good choice if you have things at the bottom of the video that must be shown. This is probably not a great choice most of the time.
You can refine the clipping by moving the video up or down by setting the Shift Video property. A positive number will push the video down and thus revealing more of the top of the video. You can use negative number to push the video up and revealing more of the bottom. This is really an edge case and generally the Clipping options will suffice.
Content Settings
These settings allow you to do two things, primarily:
- Apply Categorization to the Block
- Configure a Menu Overlay
Categorization is a common thing that isn’t specific to this block, so we’ll just discuss the menu overlay.
Configure Menu Overlay
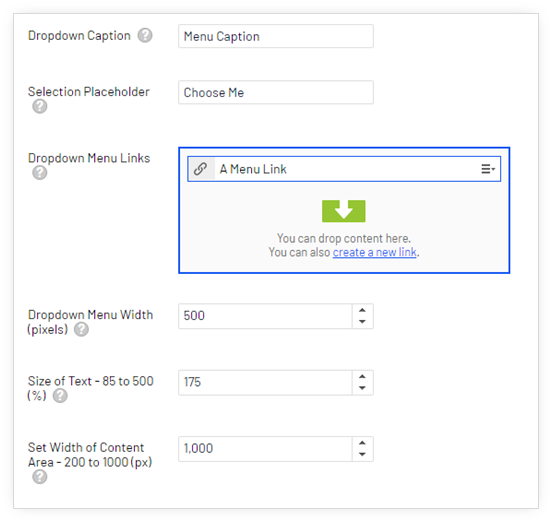
Here’s a breakdown of the property options
- Dropdown Caption (Optional). This is a label that appears above the dropdown menu
- Selection Placeholder. This is the placeholder message that appears in the dropdown menu. It typically says something like “Select a Program” or similar.
- Dropdown Menu Links. When you enter these links, the menu becomes visible. These can be links to local content, external links, email, whatever. It’s a set of typical EPiServer Links.
- Dropdown Menu Width. This controls the width of the Menu. This prevents it from getting too large or too small. Often, as you can see in the screen below, the menu is set wider than it’s content for design purposes.
- Size of Text. This allows you to configure how big the text appears. Sometimes you’ll want the text a little smaller or larger than it would normally appear. Setting a percentage here will do that.
- Width of Content Area. This helps to center the menu in the video area . Typically, it is set to something like 1000px.
Here is an example of what the menu might look like:
