Background
This block is an alternative to the Hero Video Block with Text Overlay. It only supports Videos uploaded directly to a Media Assets Folder in the UMass Chan CMS.
The benefits of this block:
- Significantly lighter weight (less script, frames, etc.) so your page load times should be much better.
- You can put your videos directly in the CMS Media Assets, so you don't have to rely on YouTube or Wistia or anything else to host the video.
View Block Example
That being said, if it’s either preferable or necessary to store your videos in a service like YouTube, then you’ll want to use the Hero Video Block with Text Overlay since it supports third-party hosting of videos.
Also, those benefits requires some more advanced things relative to preparing videos.
Preparing Optimized Videos
Not to start off with a super technical detail, but this one is important. It is critical to make sure you have "optimized" videos that you can upload to the Assets folder for your site. We are defining "optimized" as videos that are as small as possible (around 5MB) and are configured to stream, which means they'll start playing before they are finished downloading.
Creating Optimized videos is beyond the scope of this post so, for this walkthrough, we’ll assume that you or someone has created optimized MPEG4 and WebM versions of your video. By default, the block will attempt to load a WebM file, since it is more efficient but will fall back to the MPEG4 file for older browser support.
Please note that non-optimized videos can significantly slow down the loading of your page. So, if you're unsure about all of this but want to use this block, reach out for help.
Upload the Video
In any folder in your media assets, upload the two Video files. Here's an example from the Home page videos:
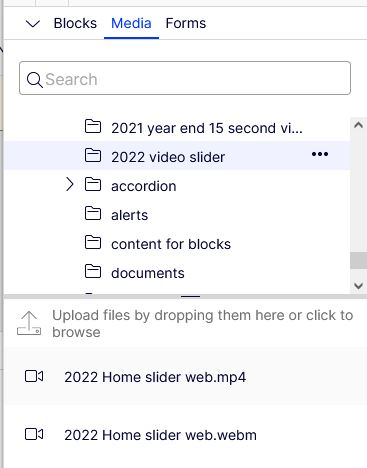
Just make a note of Asset Folder where you uploaded the videos. We’ll use those in the next steps.
Create a new block
In a dropblock area on your page, or under your folder in the block pane, create a new block
[user guide: create a new block]
For this particular block, you’ll want to put this in the Top Slider area of your site since that extends the entire width of the browser window. And most often this will go on the home page, which is typically a Microsite Landing Page.

There are quite a few properties that you can set initially, but, while we’re creating the block, let’s just give it a name.
- Add a "Name" and click the create button
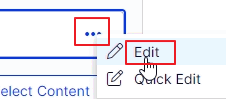
- If you created the block directly on the page, you are brought back to you page, click the "..." on your new block to edit it
Properties on the page
[user guide: properties view]
Configuring the Block
There are also quite a few property tabs for this block:
- Video Settings
- Content
- Settings
- Header Image
Most of the configuration will occur in the Video Settings and Content tabs. The other two tabs are general to all Optimizely CMS blocks so we won’t talk about those here.
Here is a screen shot of the full Video Settings for reference:
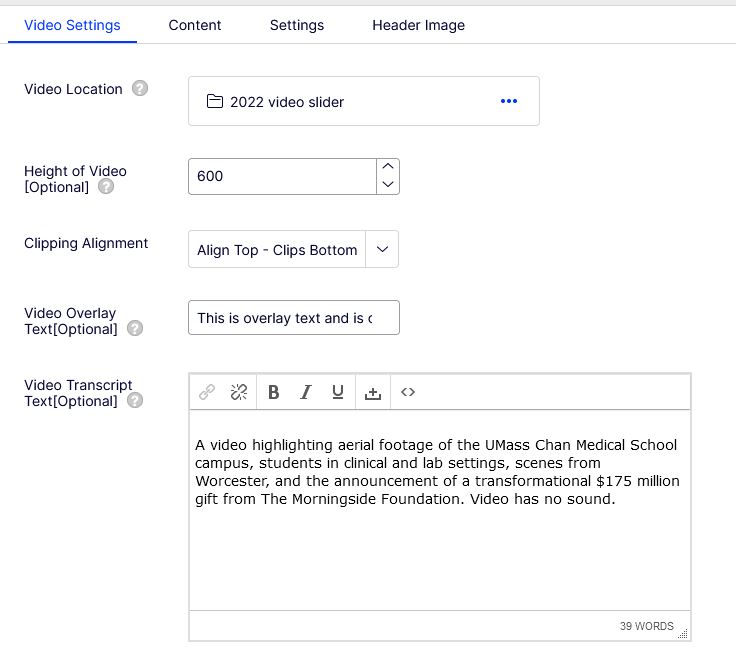
There are a few things you can configure on this block in the Video Settings:
Video Location
This is a reference to the Media Assets folder where the videos reside. Click the dots and select an appropriate folder. You can also drag and drop the folder from the Assets Tree.
Height of Video
Use this to fix the height of the Video Container so the video doesn’t get too high on wider screens. See below for a discussion of video height and clipping.
Video Clipping
Clipping is used to control the actual video placement in the container when clipping occurs. This only applies if you constrain the height of the container using the property above. We'll discuss this more thoroughly below.
Video Overlay
You can set optional text to display on top of the video content
Video Transcript Text
This is optional but recommended since it makes the video more accessible. Use this property to describe the video for those that are sight impaired.
Understanding Height and Video Clipping
Videos have a natural aspect ratio that must be maintained to prevent the video content from being distorted. When you place a video in a content area that extends the full width of the browser window, the video will get quite tall on certain displays. So, for example, on a monitor that is 1920x1080 with the browser window maximized, the video height will be about 1080px. Given that the header already takes up a few hundred pixels, a Video that is that tall will push content well below the fold.
In some cases, that is not desirable, and you may want to set a maximum height of the video to, say, 500px. Well, you can’t really fix the height of the video while maintaining the full width since that would distort the video. You can, however, constrain the height of the video container, but that will cause some of the video to be clipped.
So, when you set a height, you have to decide how you want to deal with clipping should it occur. That is, you need to decide what kind of clipping behavior is best for the video you are using.
You do that with the Video Clipping property:
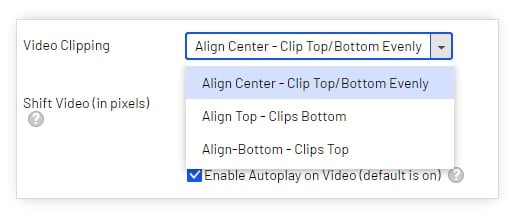
Here’s what happens when you select each of those:
Align Center – Clip Top/Bottom Evenly
This will place the actual video in the center of the video container and clip the top and bottom equally. Generally, this is a good choice.
Align-Top - Clips Bottom
This will align the video to the top of the video container and clip off any video at the bottom that is larger than the video container. This is a good choice if you have people’s heads at the top of the source video and you don’t want them clipped.
Align Bottom - Clips Top
This will align the video to the bottom of the video container and clip off the top of video that extends above the video container. This is a good choice if you have things at the bottom of the video that must be shown. This is probably not a great choice most of the time.
The Content settings allow you to do two things, primarily:
- Apply Categorization to the Block
- Configure a Dropdown Menu Overlay
Categorization is a common thing that isn’t specific to this block, so we’ll just discuss the Menu Dropdown Overlay:
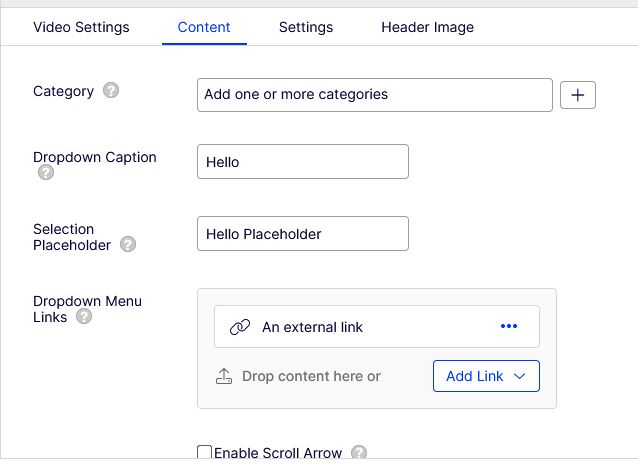
Important Note: if there is a value in the Video Overlay Text property, then the Dropdown Menu won't display. So, make sure the Video Overlay Text is blank in the Video Settings.
Here’s a breakdown of the property options:
Dropdown Caption (Optional)
This is a label that appears above the dropdown menu. This can be useful if the placeholder text isn't descriptive enough.
Selection Placeholder
This is the placeholder message that appears in the dropdown menu before an item is selected. It is best if it is fairly short, with a message something like “Select a Program." It will display "Select..." by default.
Dropdown Menu Links
When you enter these links, the menu becomes visible. That's another important note: when there are no links, the dropdown doesn't display. These can be links to local content, external links, email, whatever. It’s a set of typical Optimizely CMS Links.
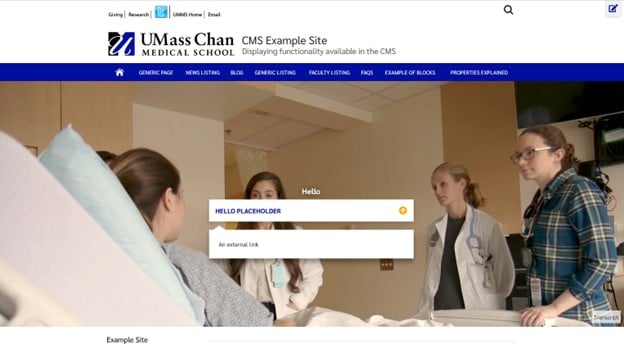
Sample Screens
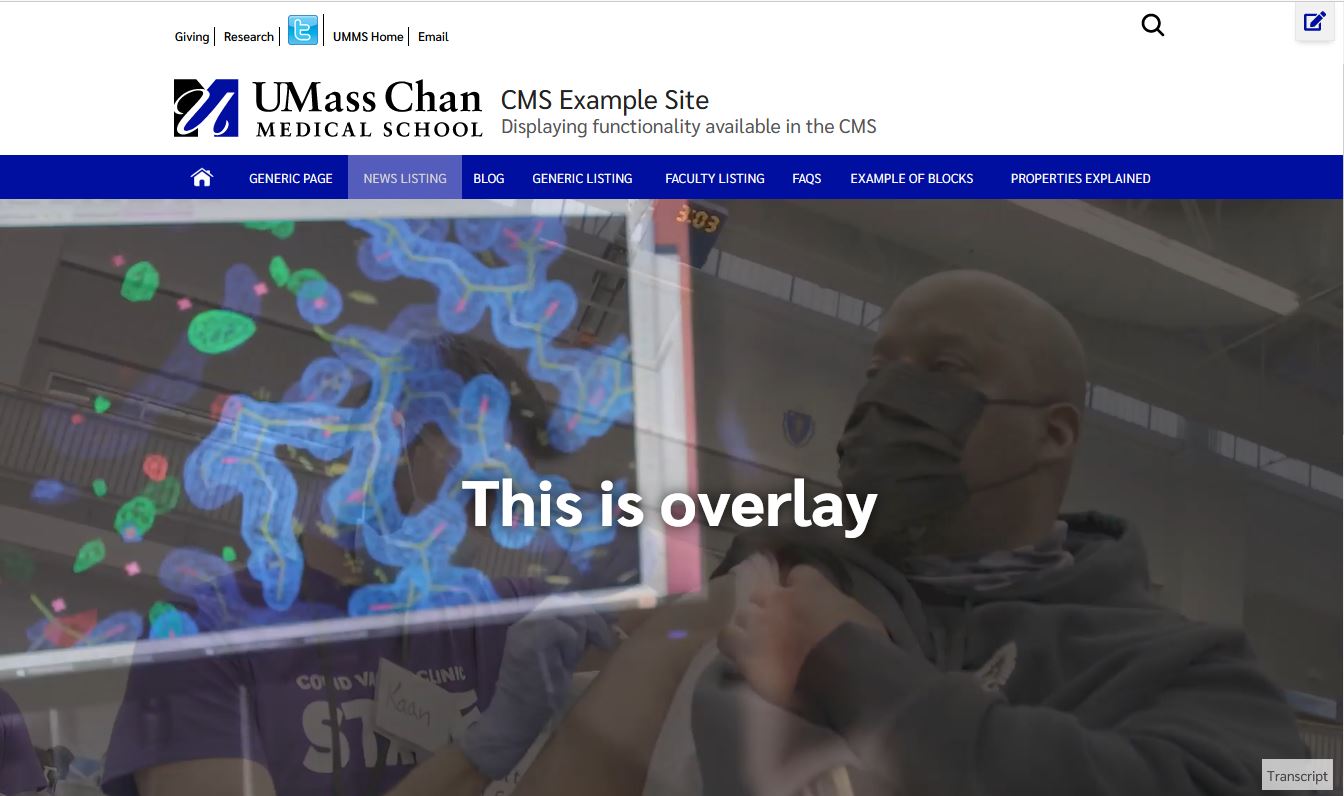
Here's a sample screen using the Overlay Text:
Here's a sample screen using the Dropdown Menu: