Member Area Background
A Membership Area in Optimizely (EPiServer) is a Page, and any of its child pages, that is restricted to a certain User Group.
We’ve added a new Membership Page and improved the existing Membership workflow a little bit. To create a Membership Area, an Editor:
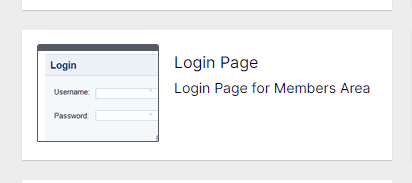
- Adds a Member Login Page to the Microsite
- In the Microsite Settings tab, populates the Login Page property with a reference to the Member Login Page
- Creates a Membership Page
- Adds Members (User Accounts) so people can sign into the Membership Area
There are a couple of things that are different and improved from the past approach:
- Microsite owners/editors do not have to make any requests to EPiServer Team or anyone in IT because creating a Member Area Page automatically creates a Membership Group specific to that Page. In addition, the creation process automatically sets Access Rights to the new Membership Group.
- The Microsite owners/editors can manage user accounts directly in the CMS Editor. So, you can add users, remove users, and change passwords. It all only affects the pages in that Membership Area
Creating a Membership Area
The first two steps are unchanged from past , so if you already have a Login Page and the correct Microsite Settings, then skip down to Step 3.
Step 1: Create the Login Page
Directly under the Microsite Page, add a Login Page.
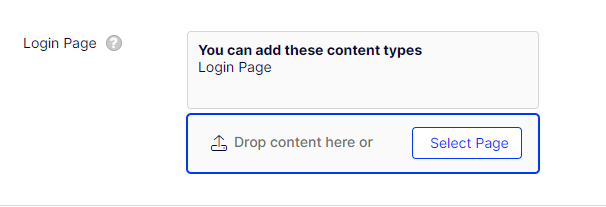
Step 2: Add a Reference to the Login Page
Within the Settings tab of the Microsite Page, click the “Select Page”. You will get a dialog box. Navigate to the Login Page you just created and select it. Alternatively, you can simply drag and drop the page from the Page Tree in the left panel into the box that says “Drop content here or.”
Step 3: Create a Member Area Page
This is typically right under the Microsite Page, but it can be anywhere in the Microsite:
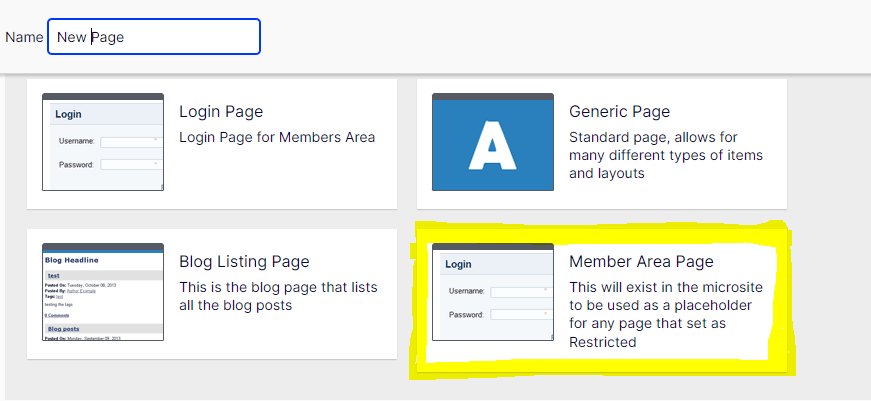
Give it a name and fill out any required fields and click Create.
Step 4: Add User Accounts (Members)
Now, you can click on the Membership Tab and start adding User Accounts.
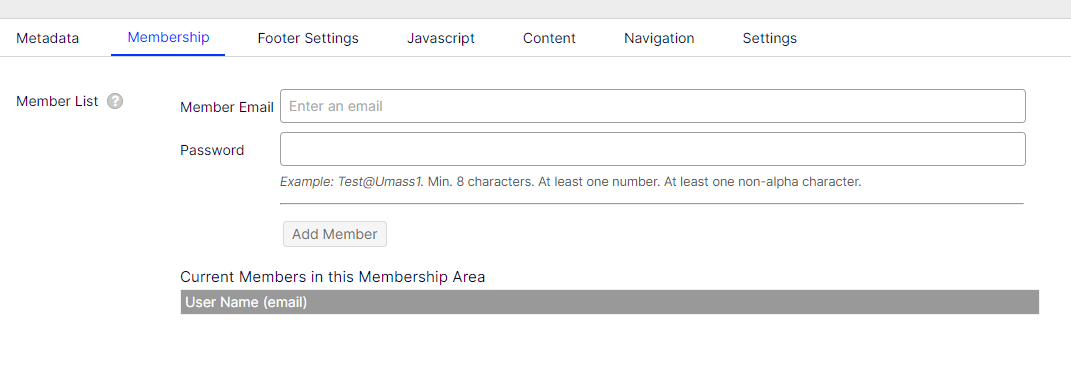
To Add a new User Account (Member):
- Enter a Member Email (this serves as their username for sign in purposes)
- Enter a Password. Note the password requirements, which require a password of at least 8 characters that contains at least one number and at least one non-alphanumeric character (like an @, for example)
- Click Add Member
You will see the new member added to list of Current Members below.
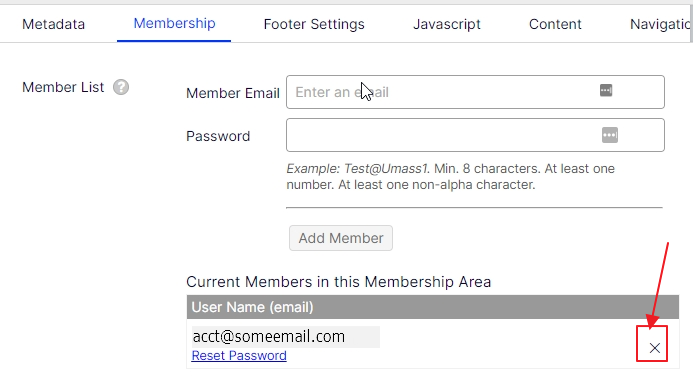
Once you have members in the list, there are two things you can do with them:
Remove a member
- In properties view, on the Membership tab, click on the [x] to the right of the User Name. This will remove them from the Membership group.
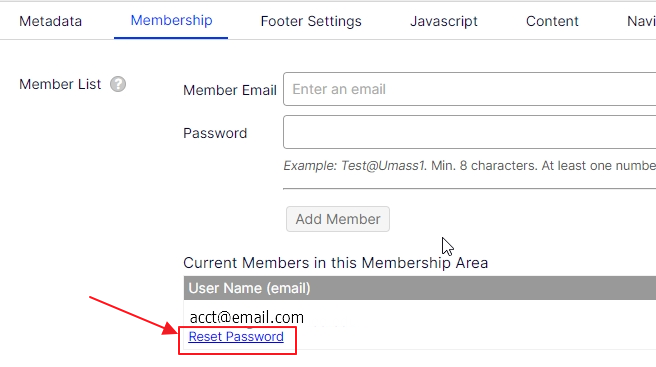
Reset the User Password
- In properties view, on the Membership tab, click Reset Password link under the account you which to update.
- This is necessary if someone forgets a password since there is no way for a Member (User) to retrieve or reset their password.
Note that you cannot change a User Name (Email). To change a user name, you will have to delete the user account and add a new one with the correct email address.
Also note that we do not use the email for anything but as a login username. The simple purpose to use email is that it is a unique identifier.

